Front-end Deployment
In the first step in this workshop, we will host the web application (front-end) with S3 Static website hosting:
- Open Amazon S3 console

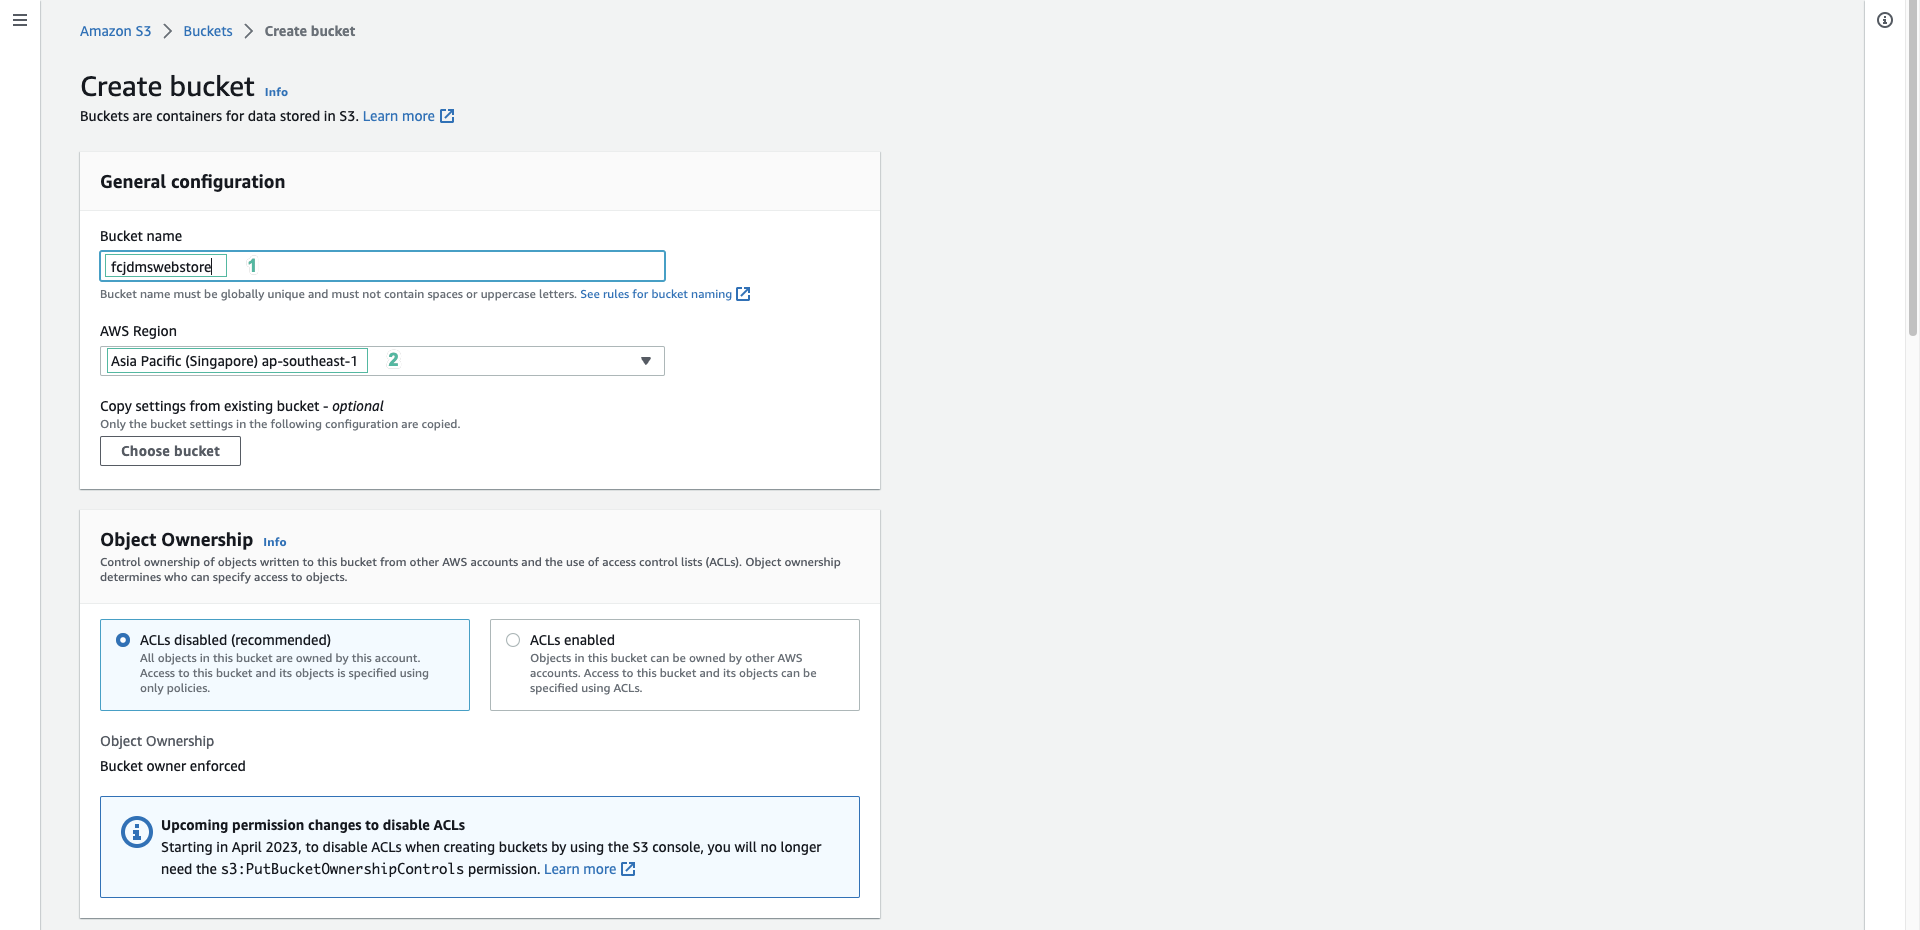
- Click Create bucket

- Enter bucket name, such as:
fcjdmswebstore
- Select the region closest to you
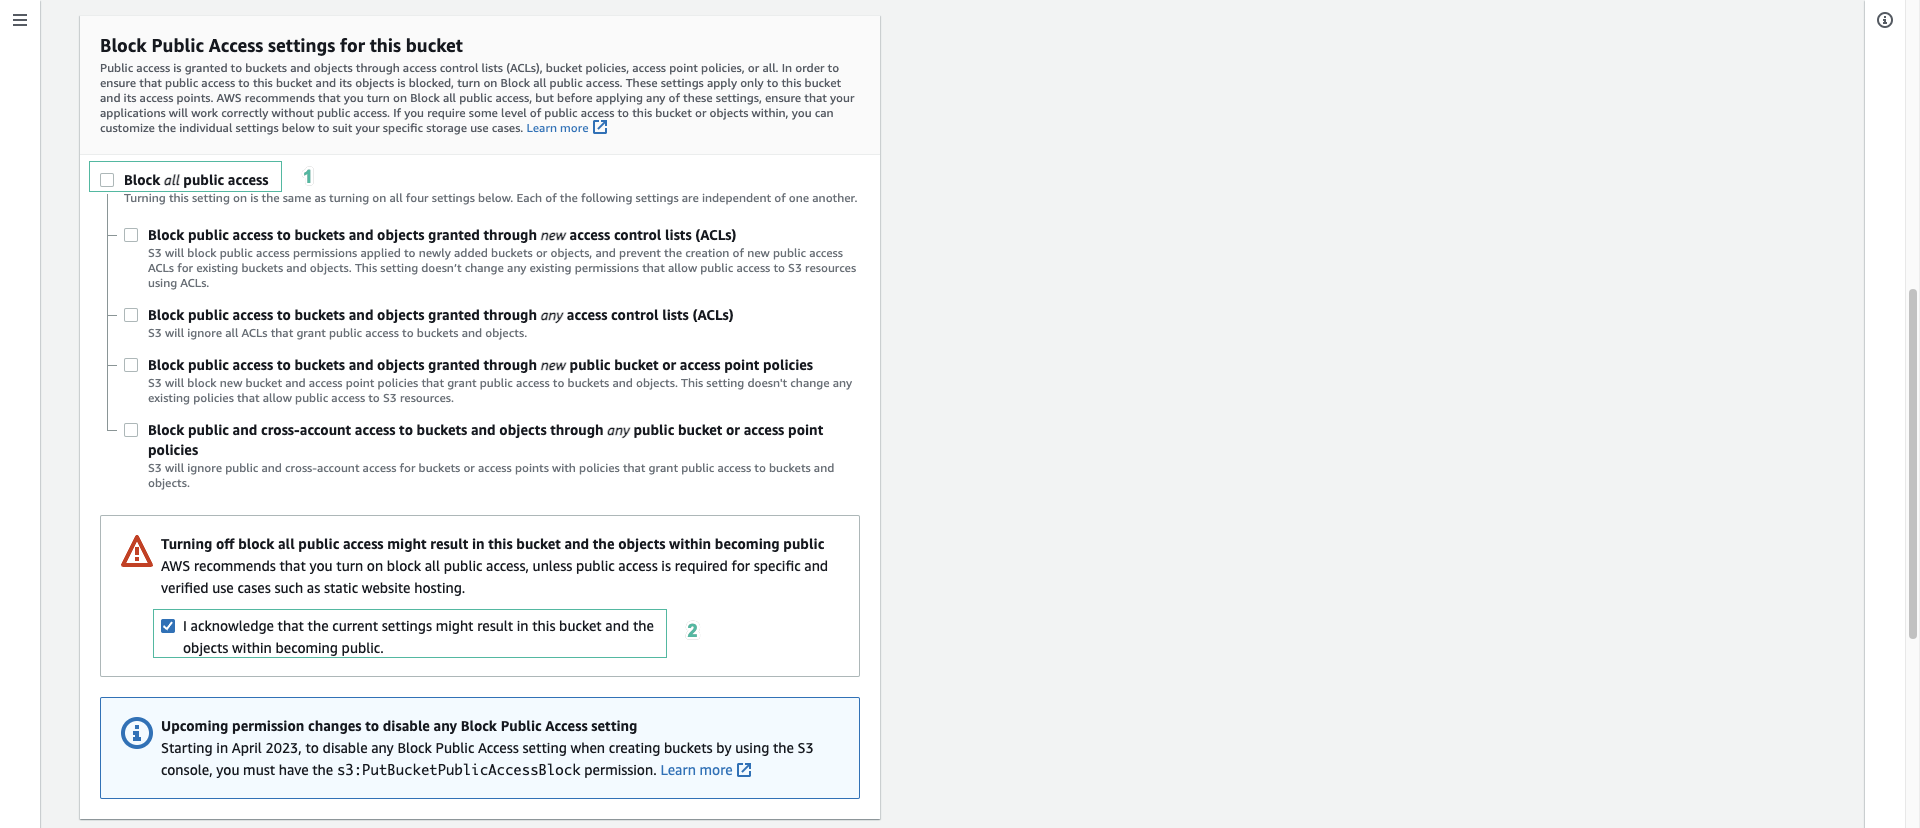
- Uncheck block from allowing public access
- Check to I acknowledge that the current settings might result in this bucket and the objects within becoming public
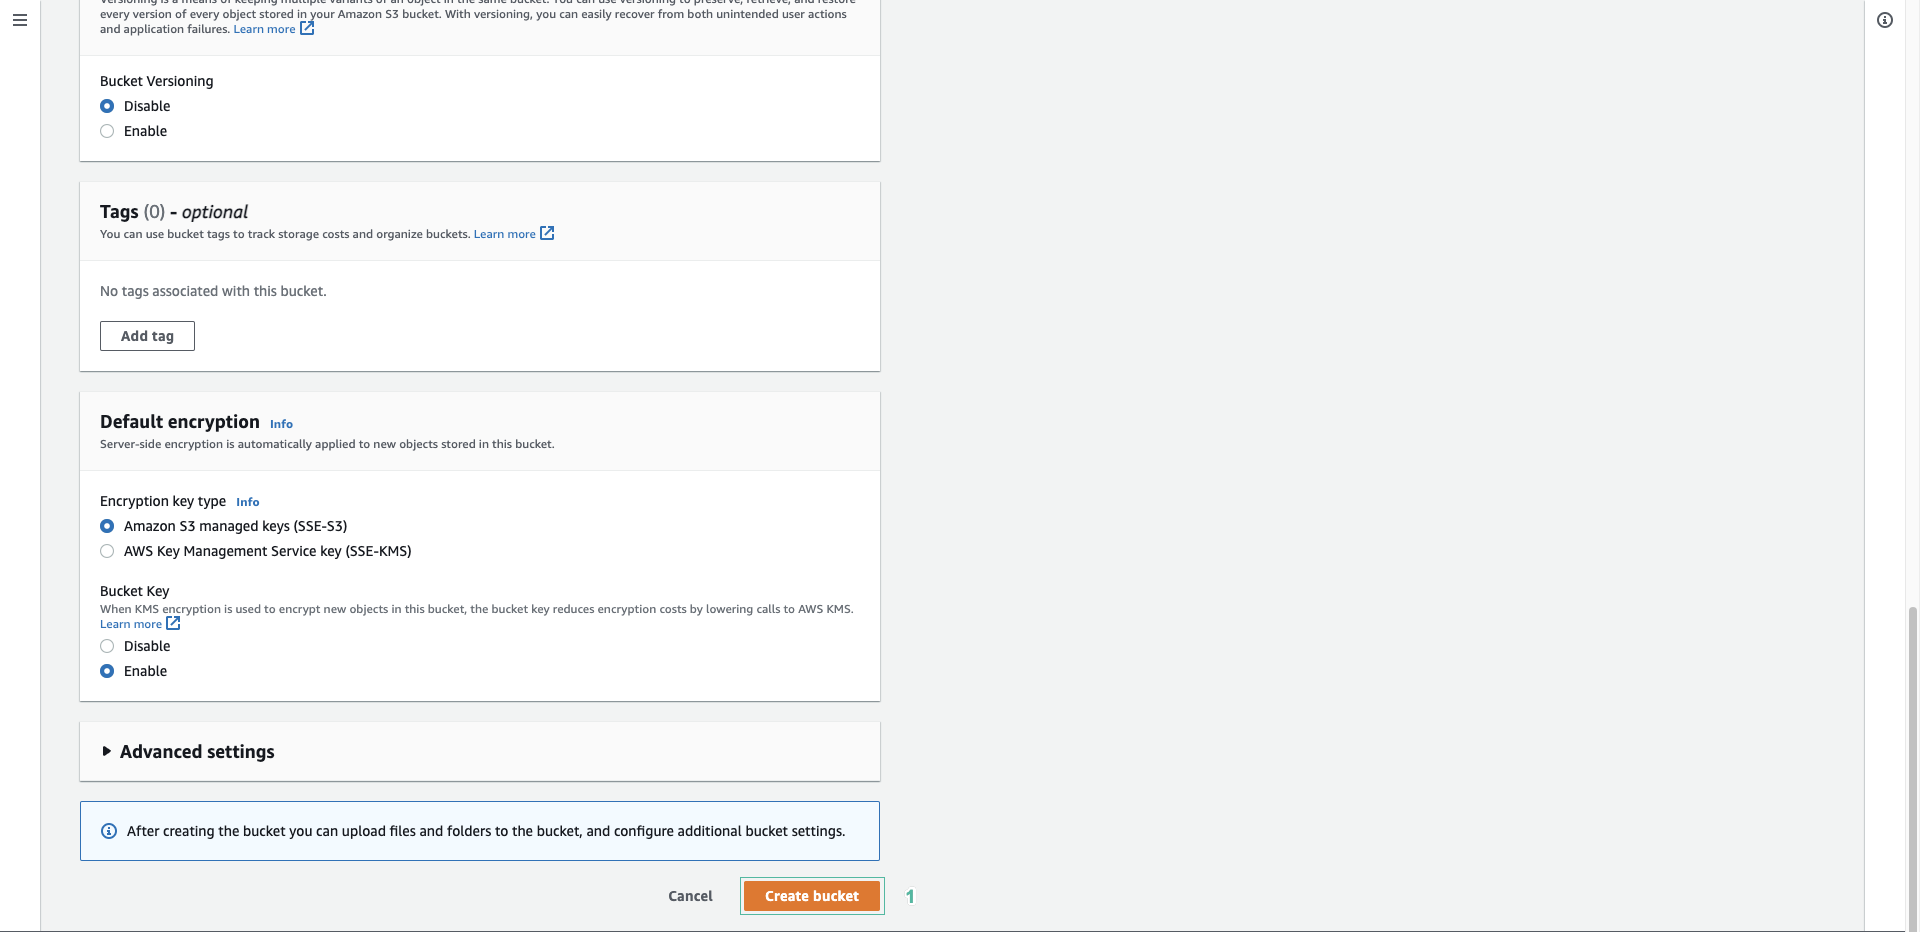
- Click Create bucket button
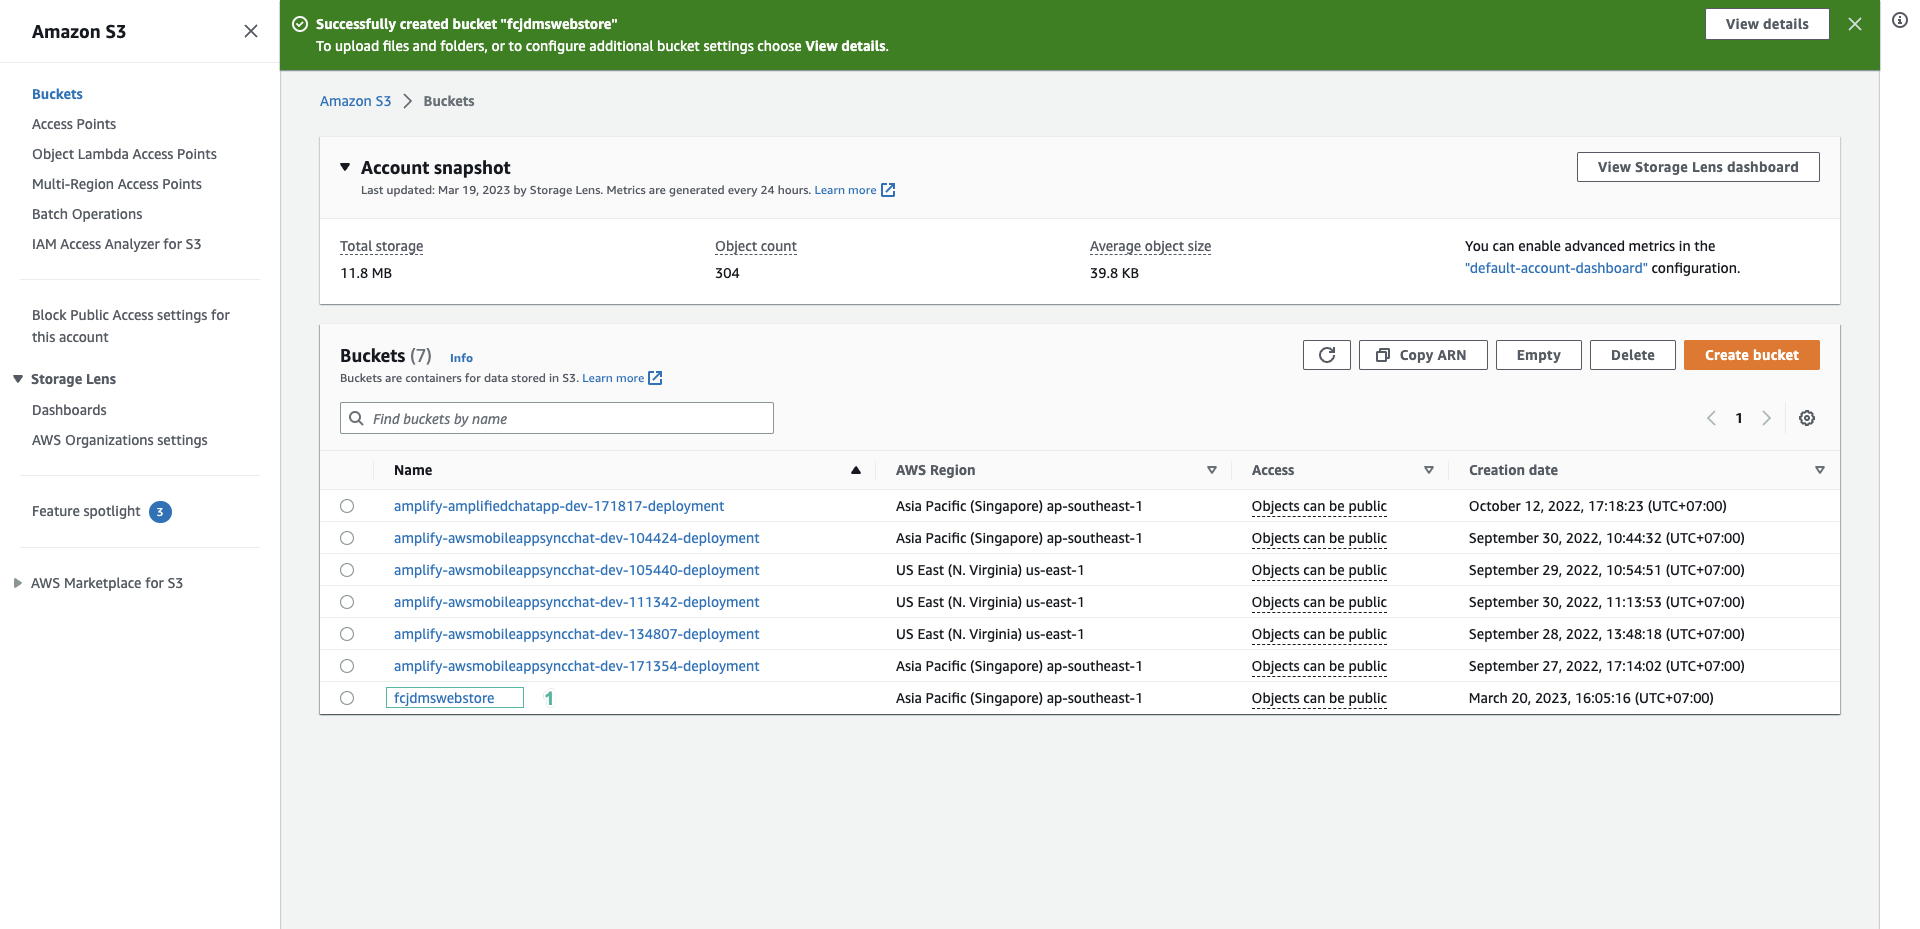
- Click on created bucket
- Click Properties tab
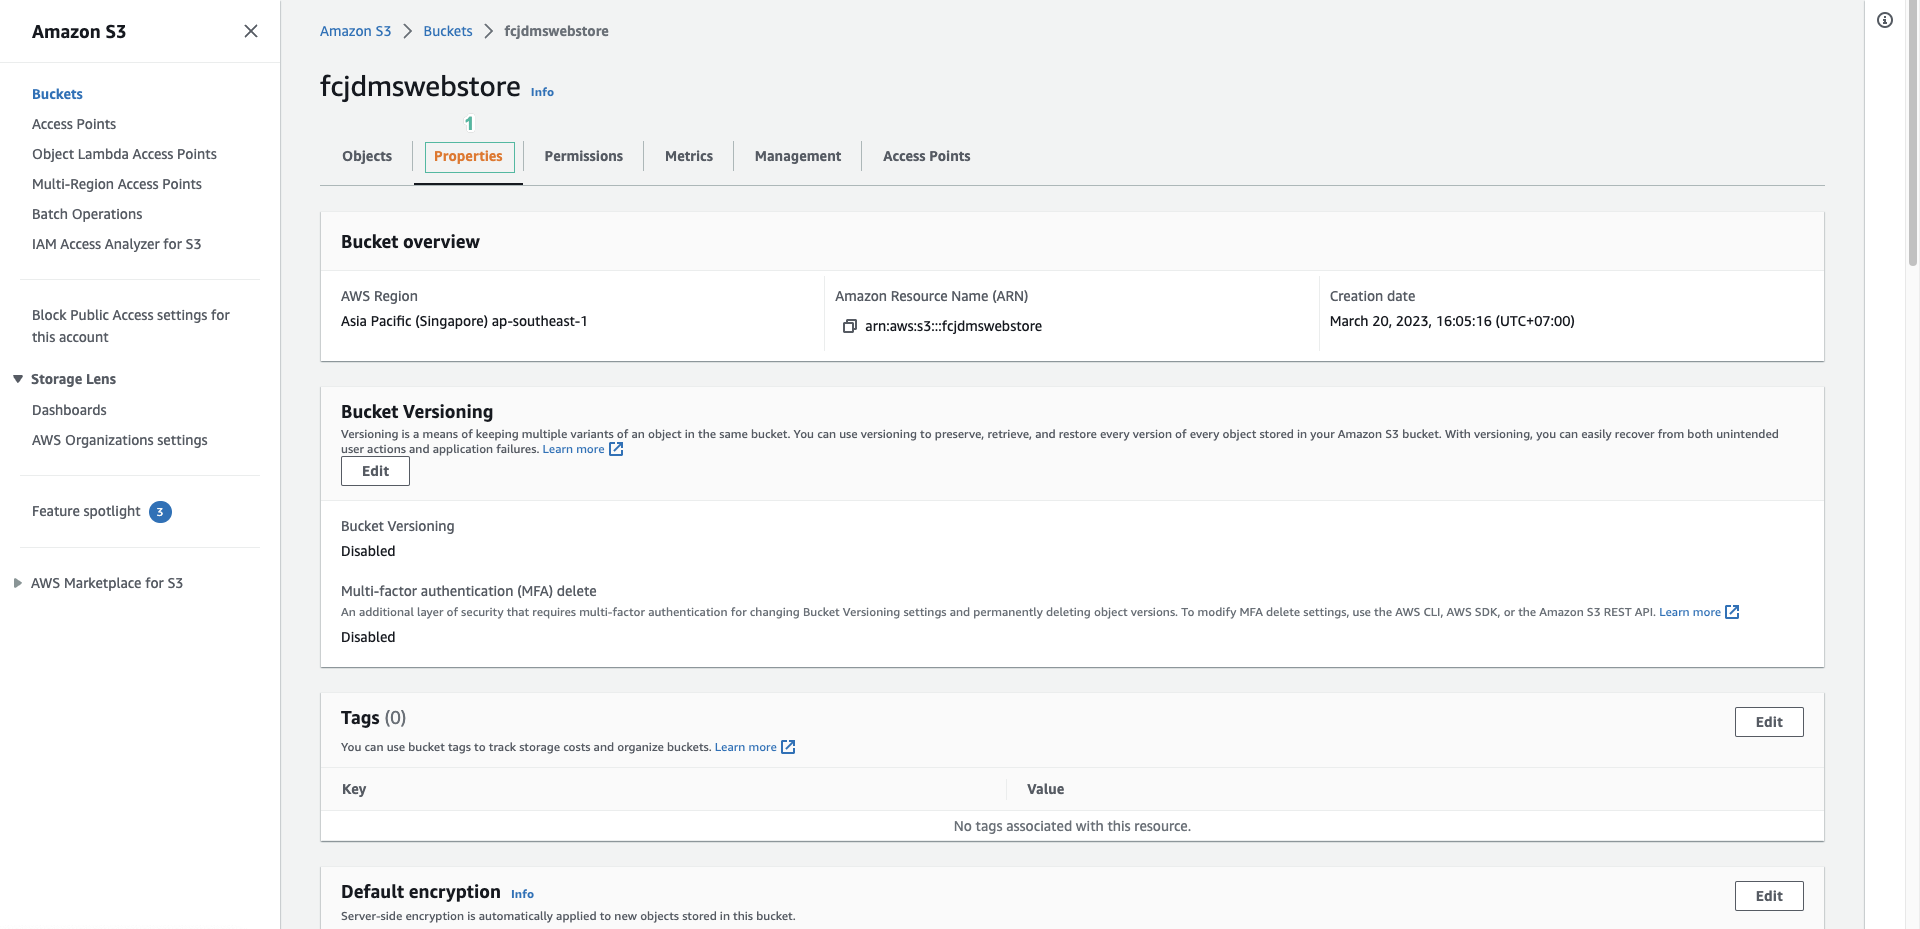
- Scroll down to the bottom, click Edit in Static web hosting pattern
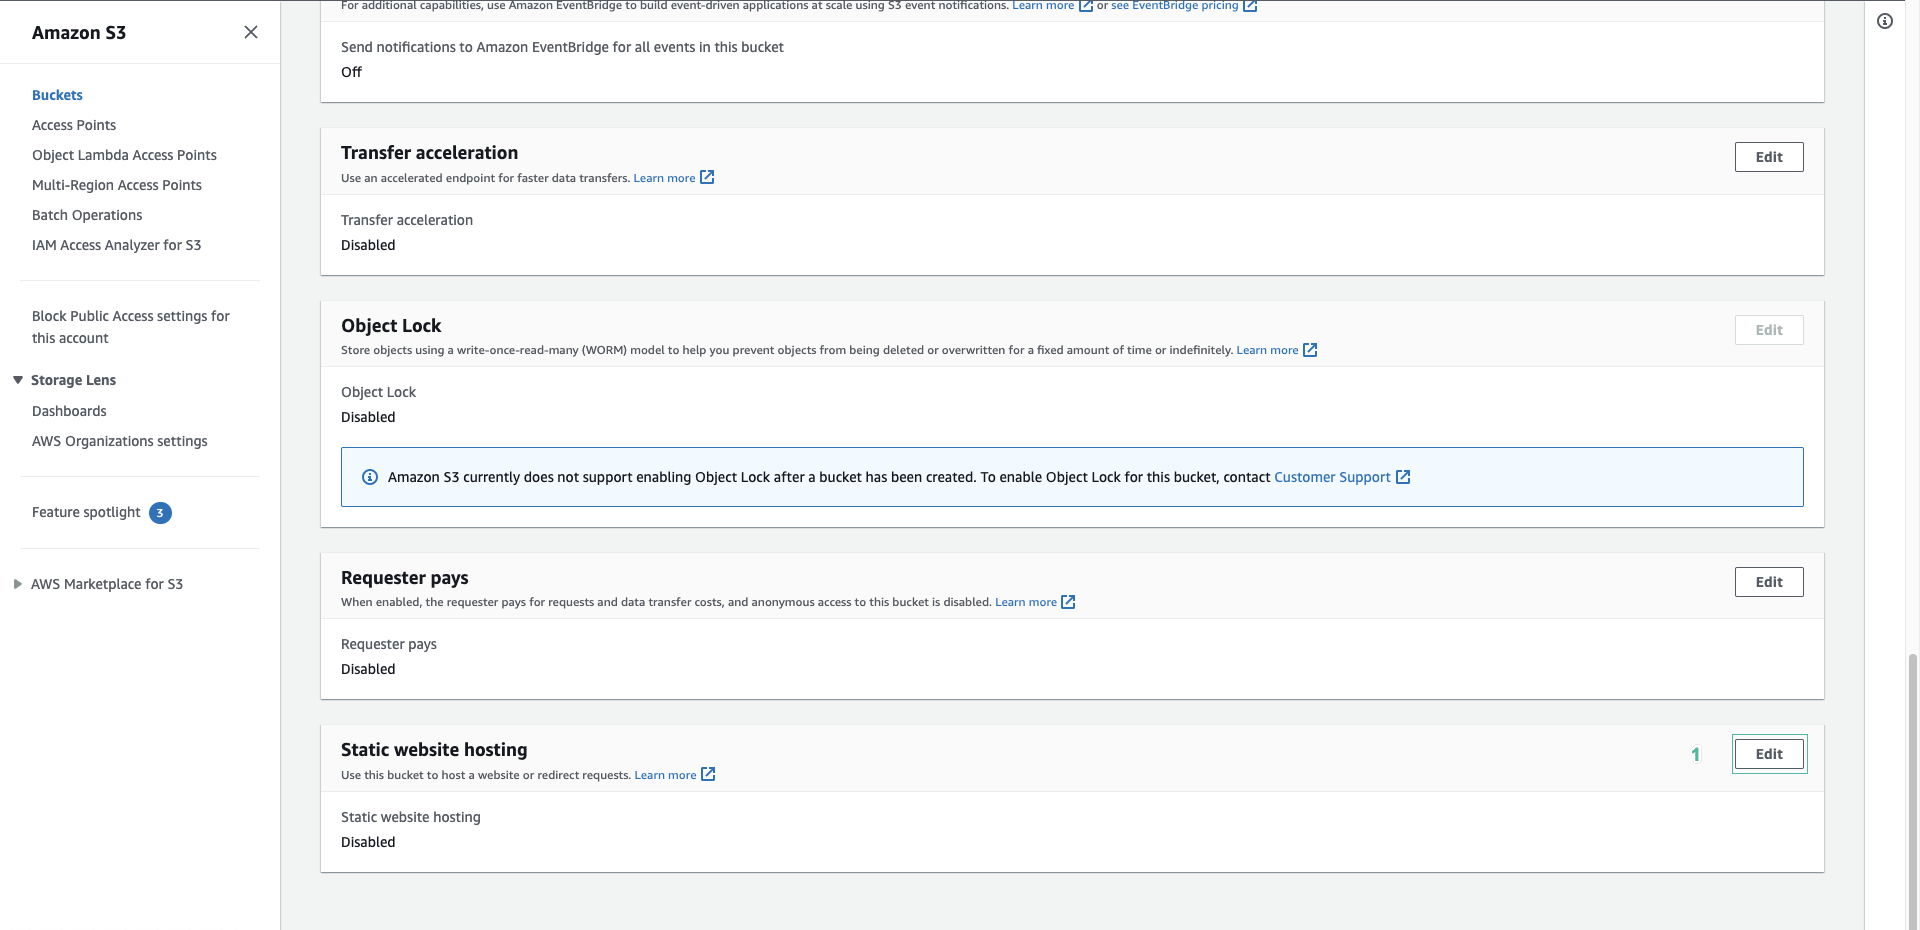
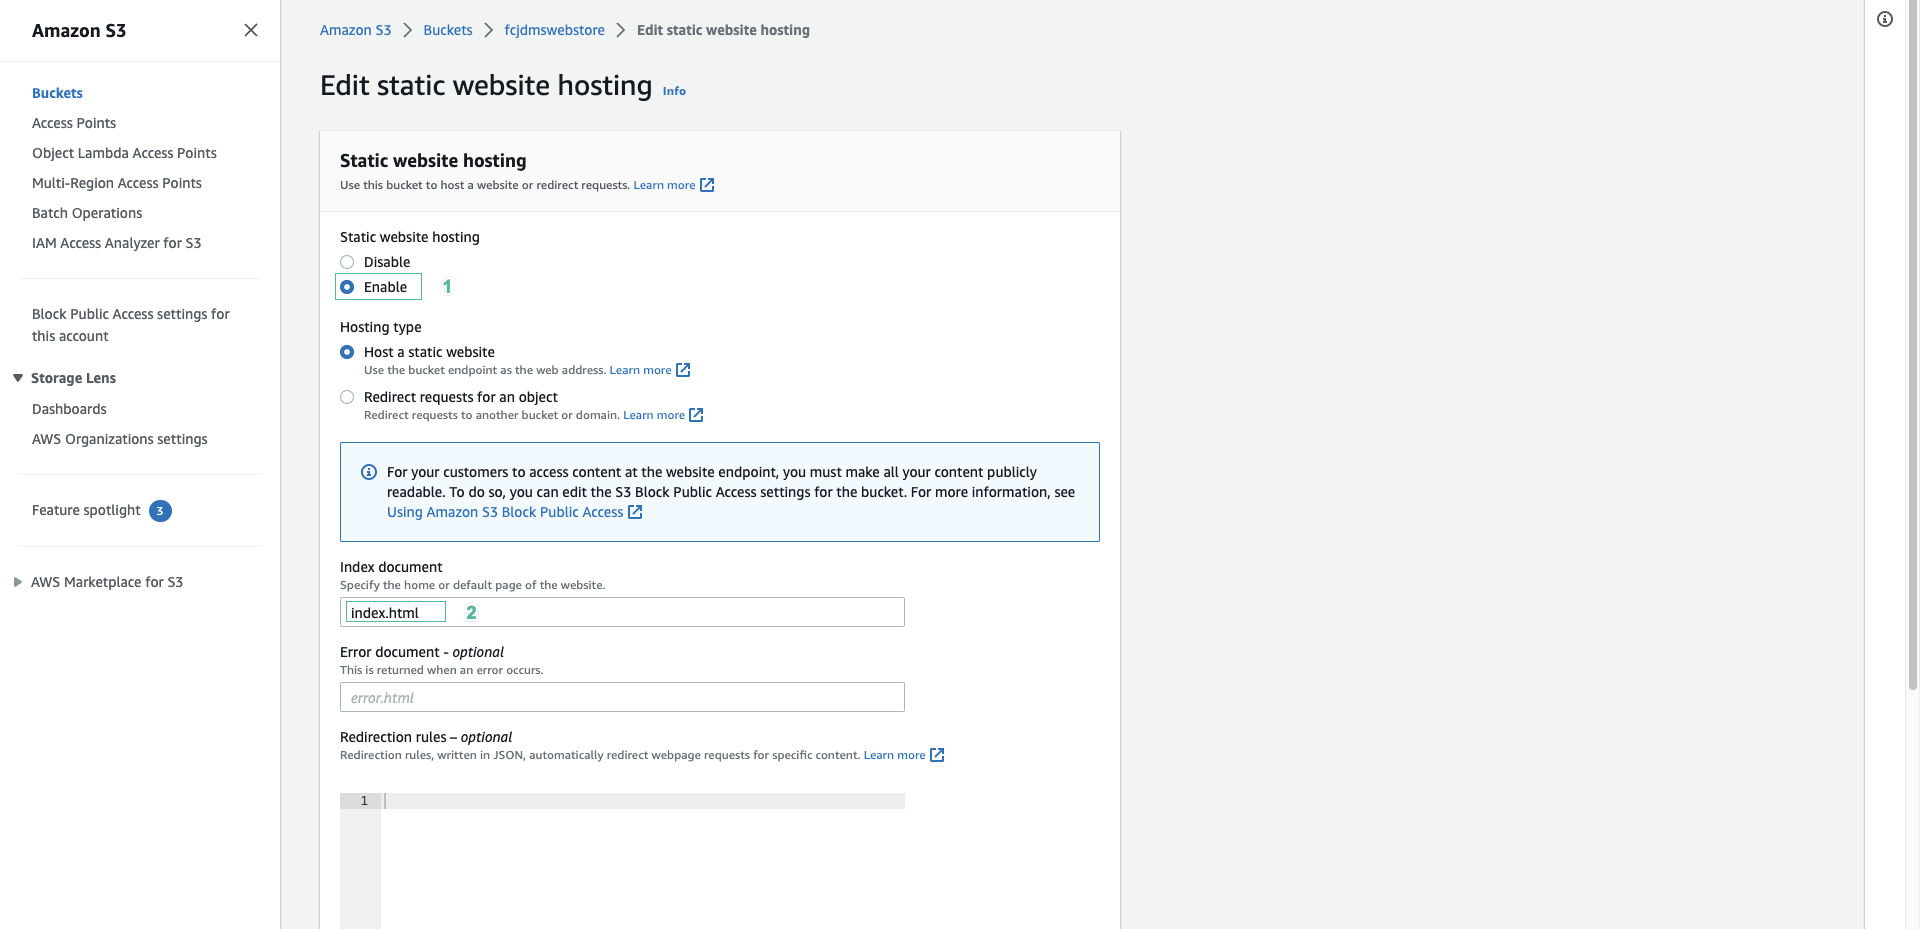
- Select Enable to enable host web static on S3
- Select Host a static website for Hosting type
- Enter
index.htmlfor Index document pattern
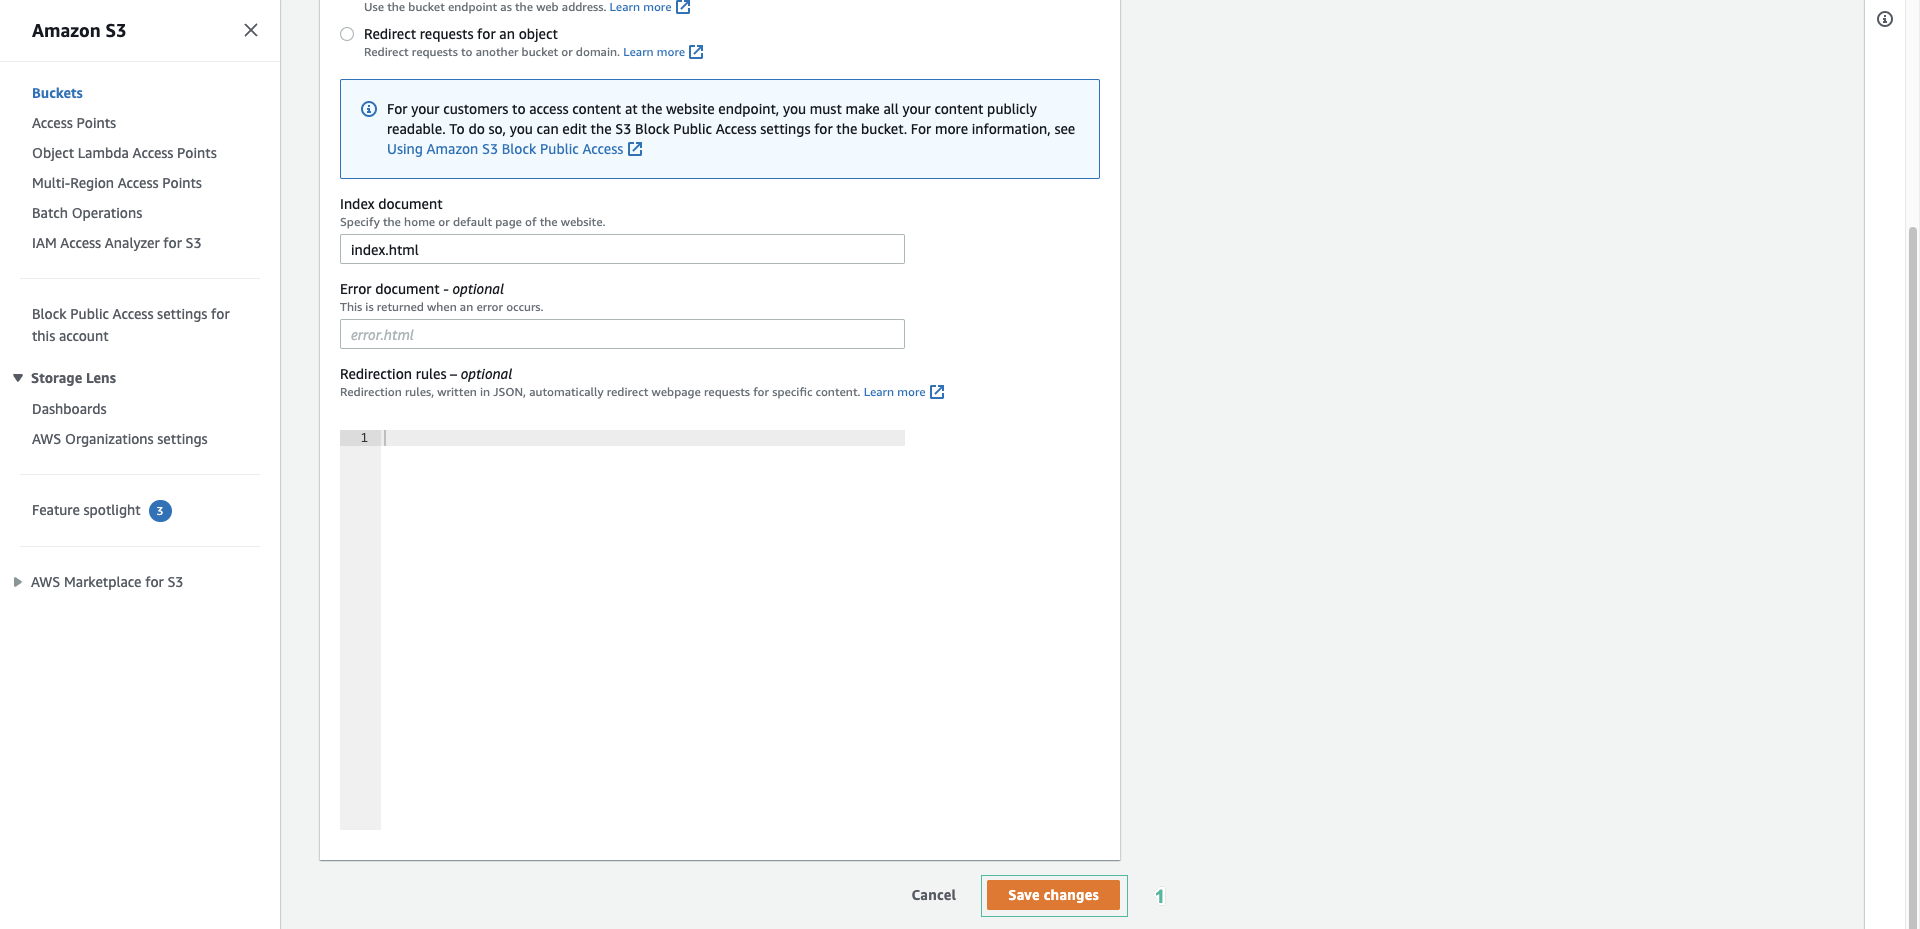
- Click Save changes
- After successfully enabling, please write down the path of the web
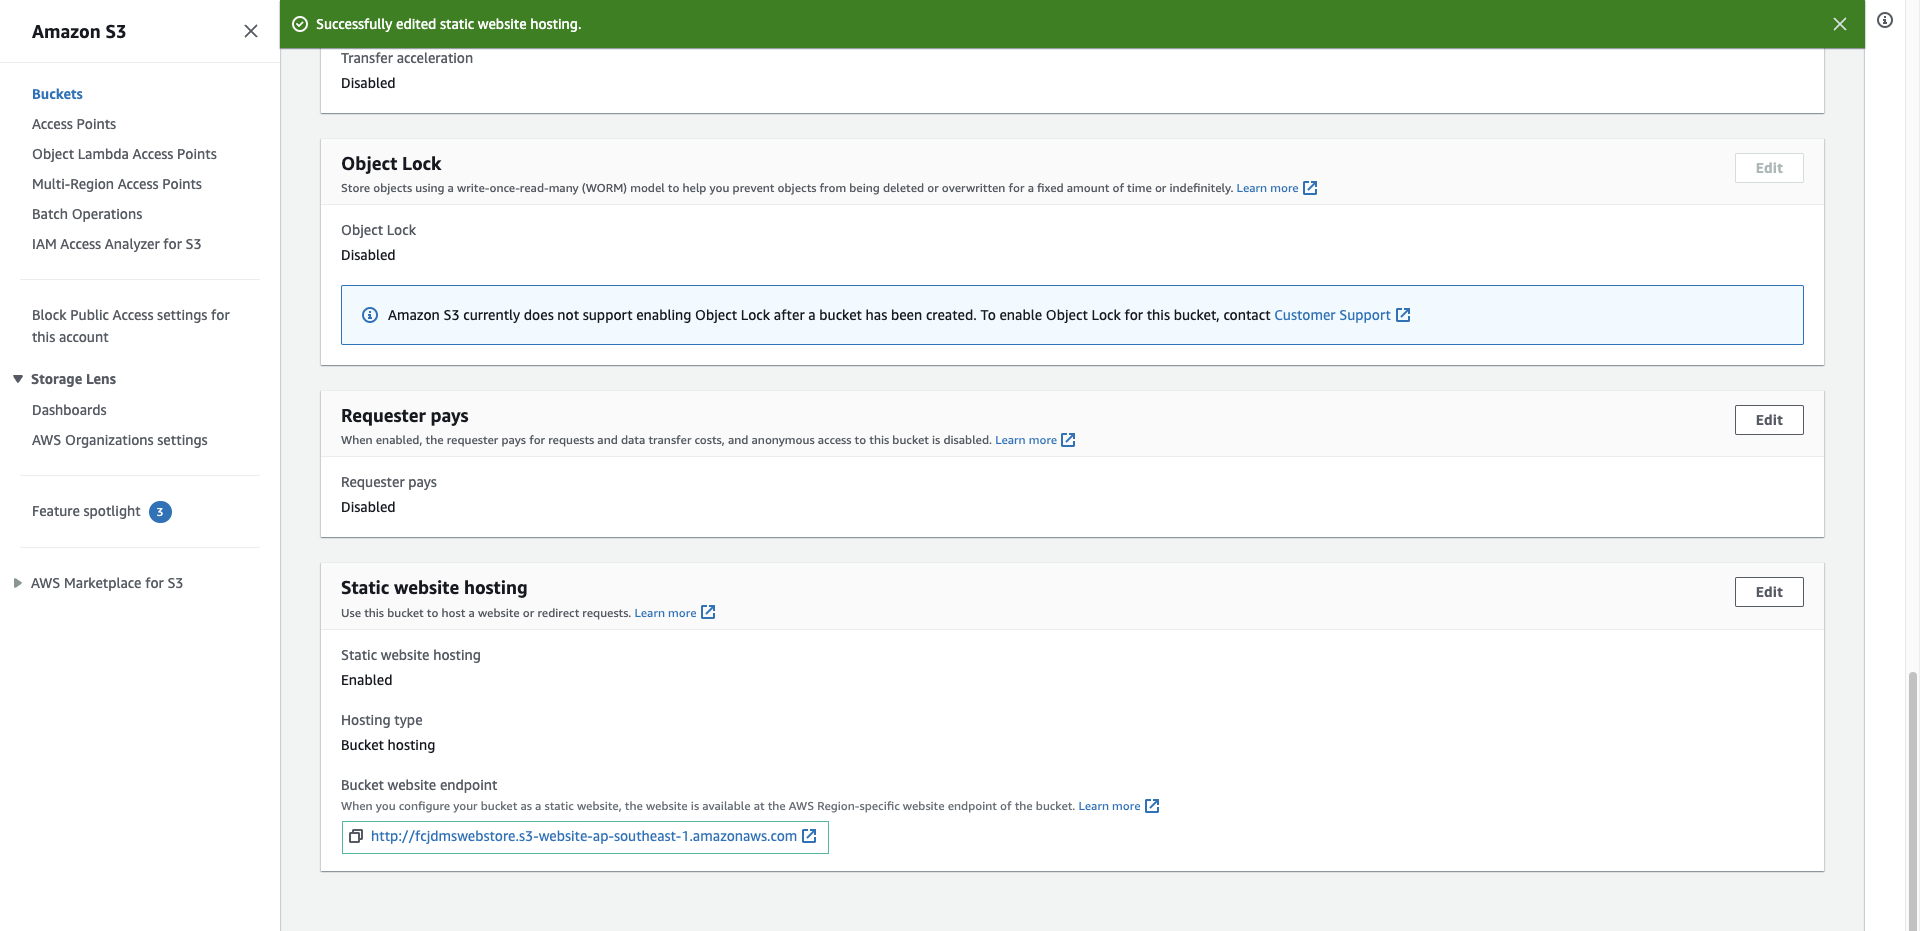
- After successful enable, please take note of the path of the web:
- Select Permissions tab
- Click Edit of Bucket policy pattern
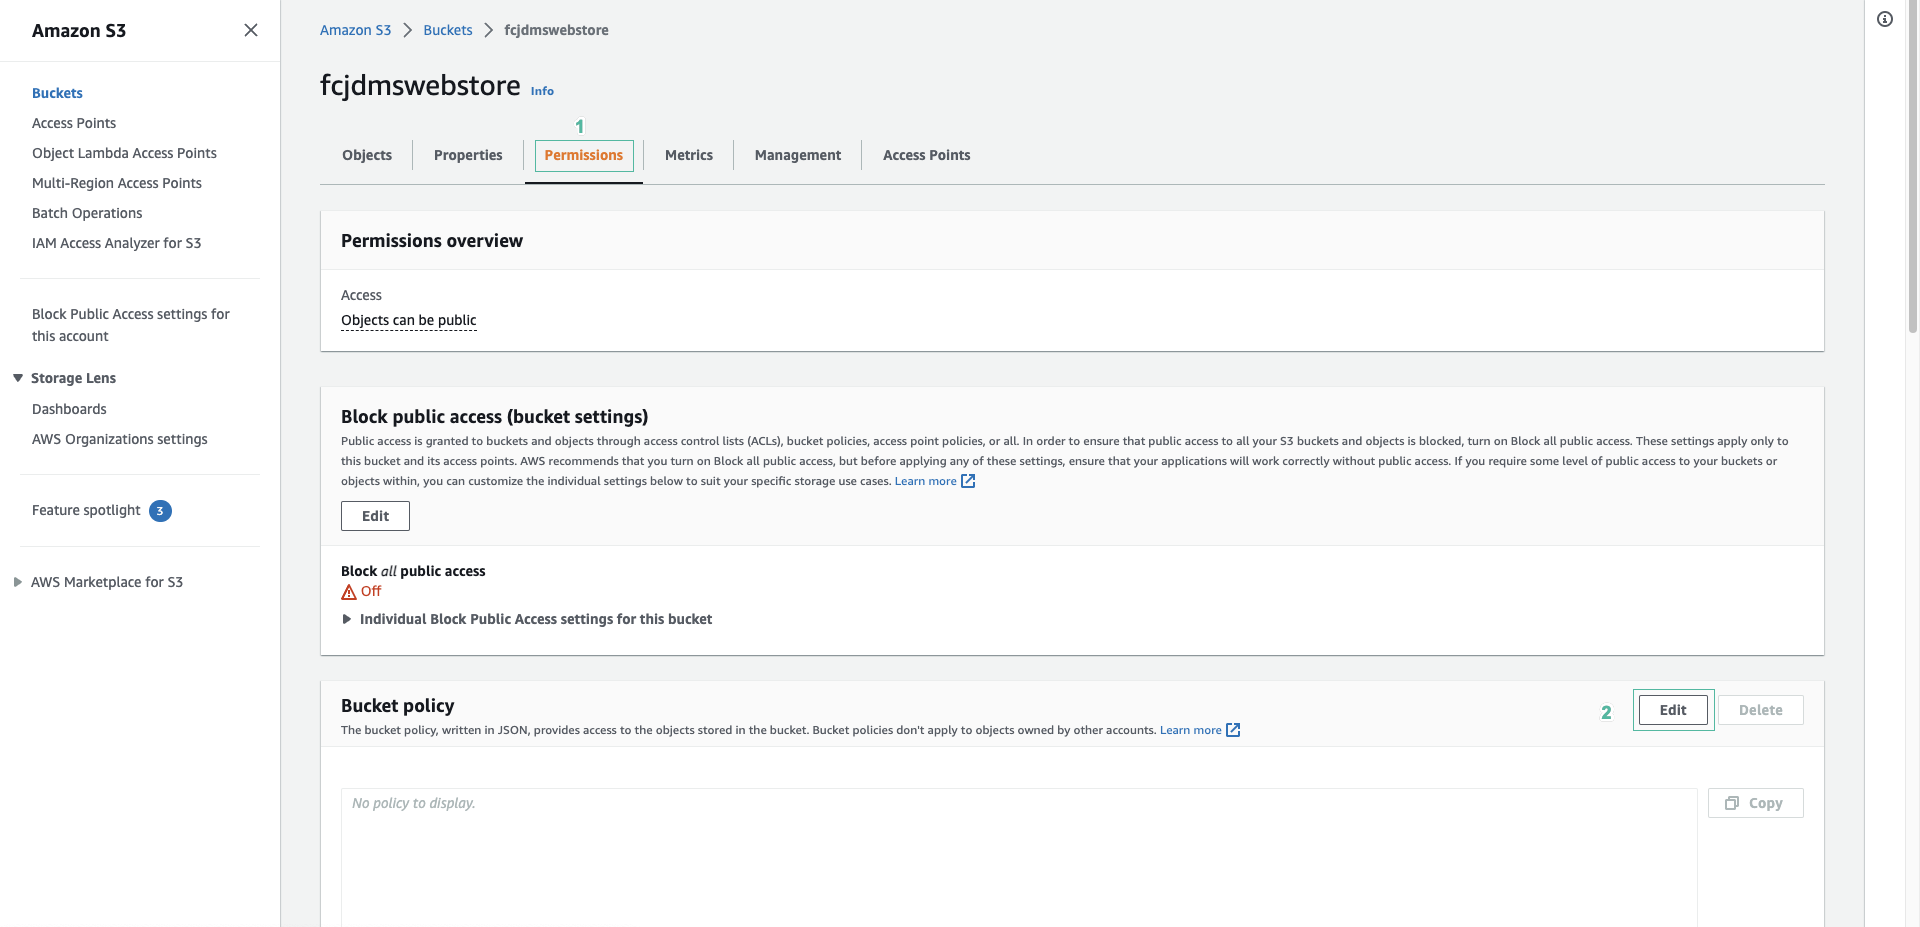
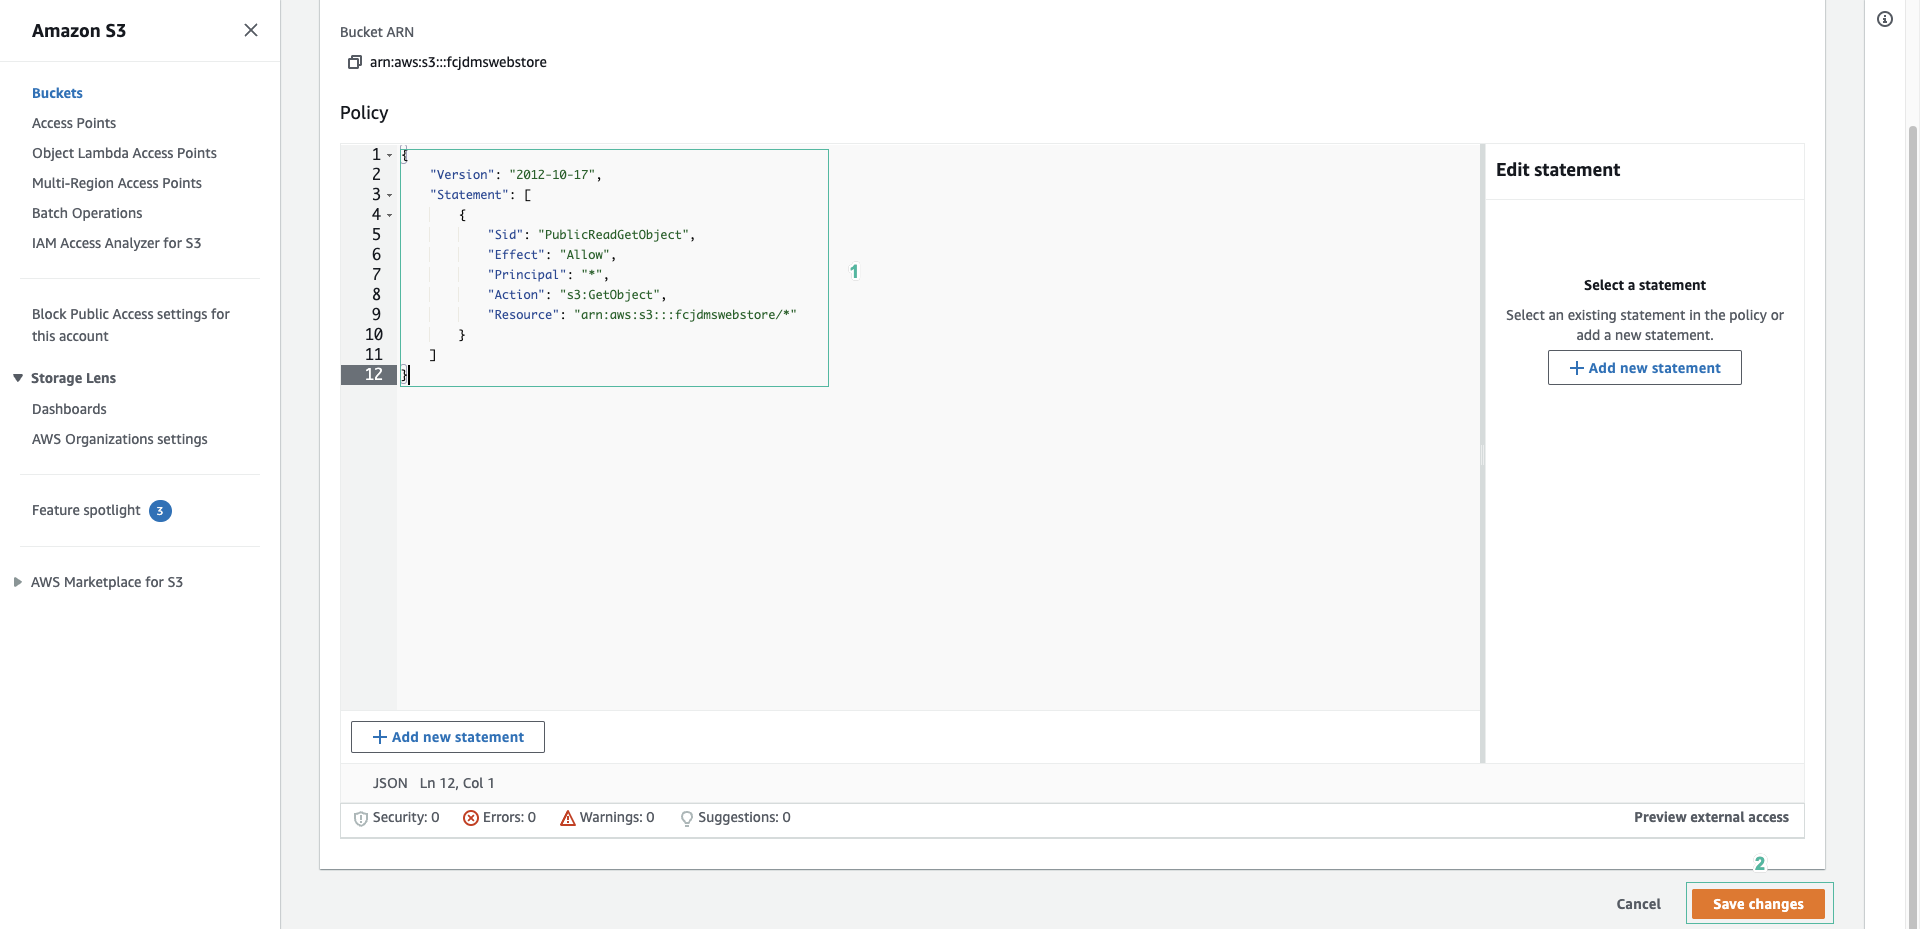
- Copy the below code block to Policy
{
    "Version": "2012-10-17",
    "Statement": [
        {
            "Sid": "PublicReadGetObject",
            "Effect": "Allow",
            "Principal": "*",
            "Action": "s3:GetObject",
            "Resource": "arn:aws:s3:::BUCKET_NAME/*"
        }
    ]
}
- Replace
BUCKET_NAMEwith the bucket name you created, then click Save changes
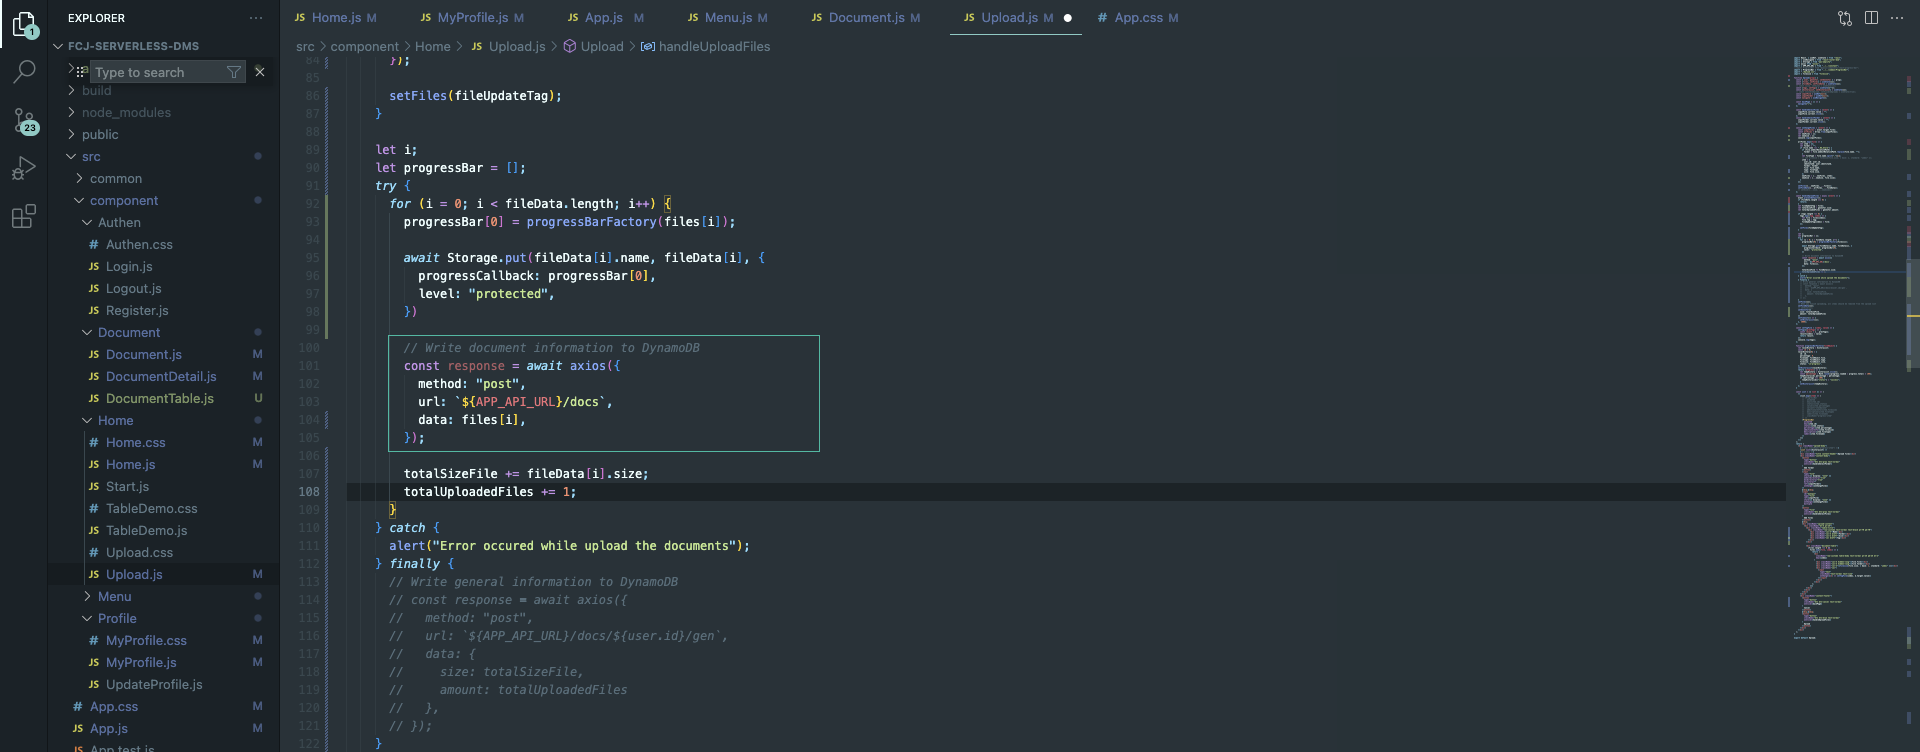
- Open the src/component/Home/Upload.js file in the application’s source code directory and uncomment the code that calls the API to write data to DynamoDB.
- Next run the following command at the root of the project you downloaded from workshop 2.
yarn build
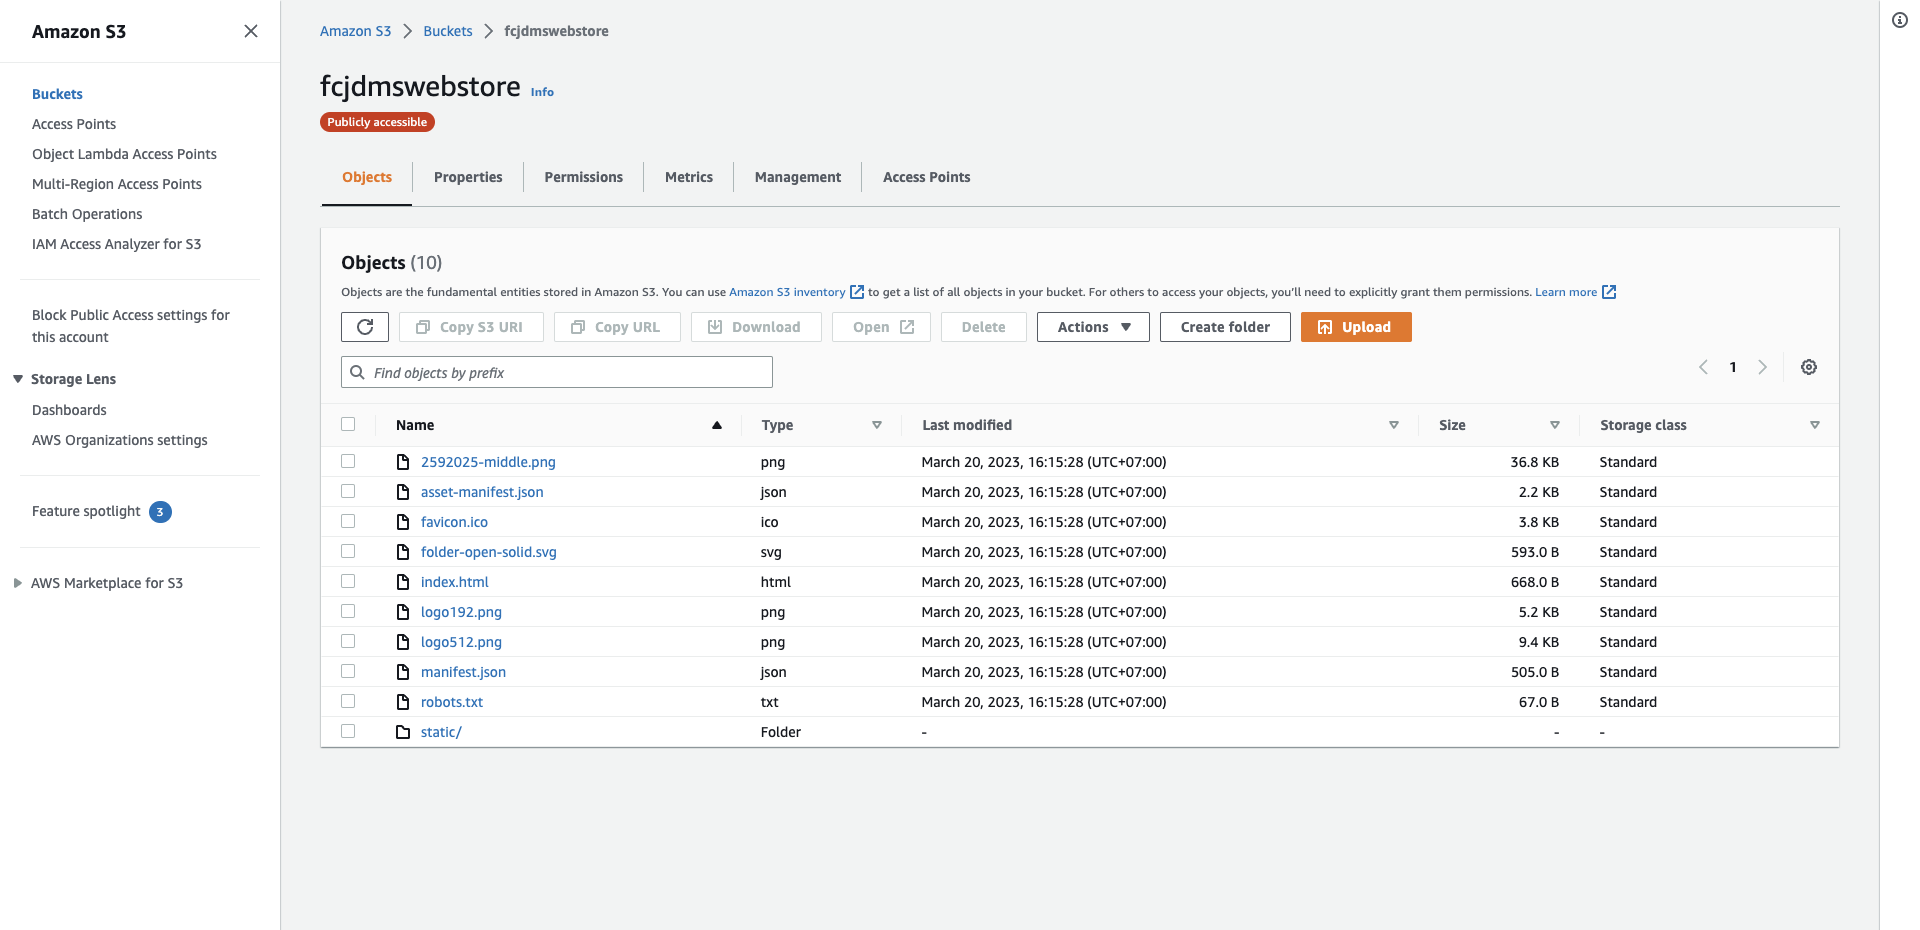
aws s3 cp build s3://BUCKET_NAME --recursive
- Replace
BUCKET_NAMEwith the bucket name you created
If your upload fails, configure the access key ID, secret access key, aws region and output format with aws configure command
- Paste the web link you take notes into your web browser
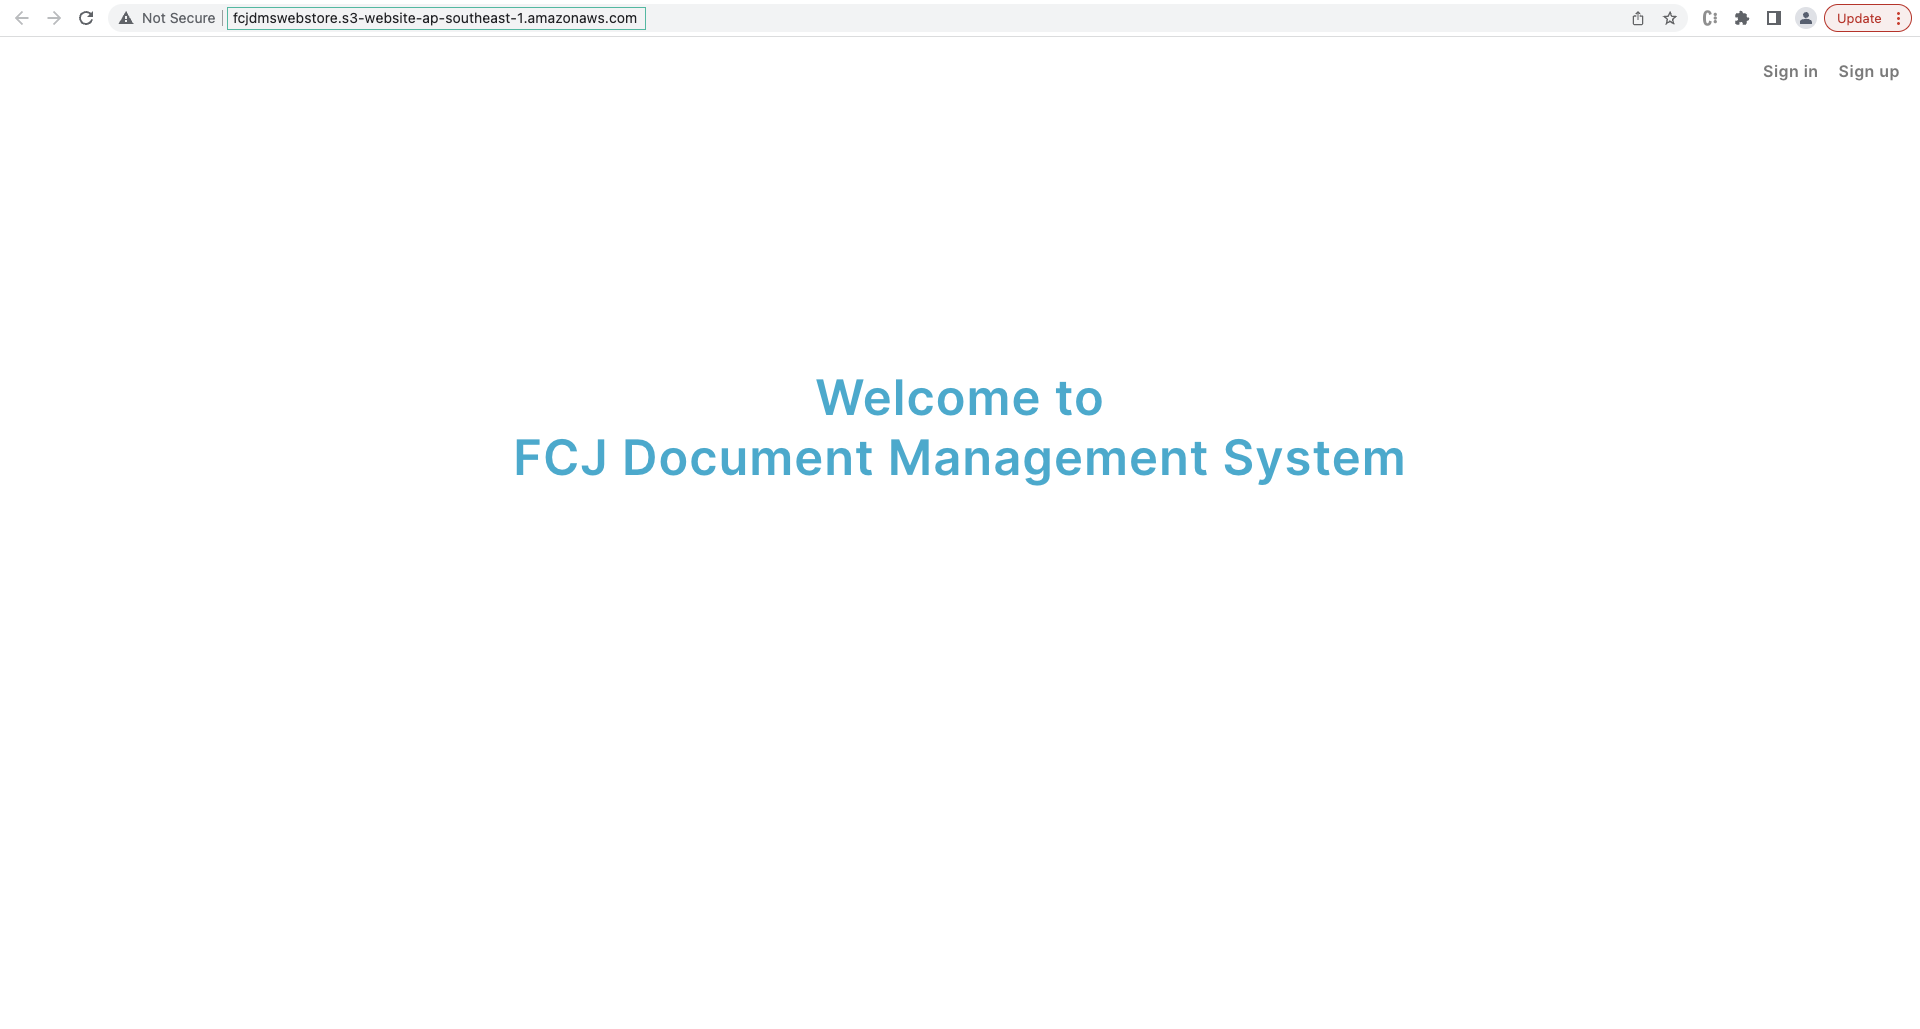
You have finished hosting your website on S3. In the next section, we update the lambda functions of workshop 2.